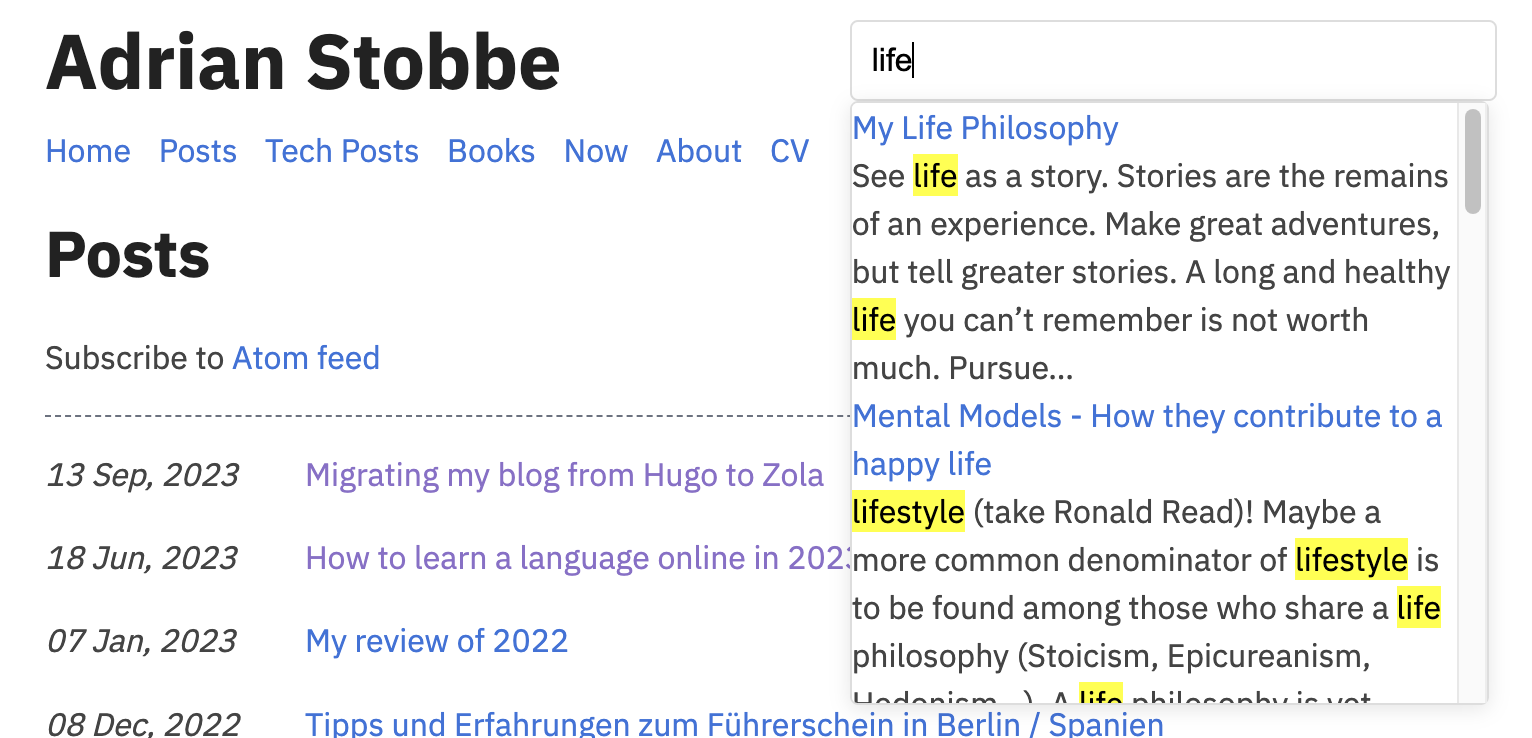
After my recent blog migration to Zola, there was one feature I was still missing - search. I found it very useful in the past to quickly find old blog posts and I realized that most blogs don’t have it. But it’s easy to set up, and I want to show you how using elasticlunr. The end result will look like this:
TLDR: see this commit.
🔗1. Create a search index
In order, to quickly search your content you will want to have a precompiled search index available.
Zola documents how to do that, but it wasn’t so clear to me that you would have to add it in a search table entry.
This is all you need to add to config.toml:
build_search_index = true
[search]
index_format = "elasticlunr_json"
🔗2. Create a searchbar and show results
Next, we will want to show a searchbar to the user, fetch the search results from the user query and show them in a results overlay below the search bar.
A common choice is to place the searchbar on the top right corner. I decided to put it right next to my blog title. In Zola, you will find the relevant section likely in index.html or base.html:
<header>
    <div class="header-container">
        <a href="{{ config.base_url | safe }}" class="title">
            <h2 class="name">{{ config.title }}</h2>
        </a>
        <div class="search-container">
            <input type="text" id="search" placeholder="Search...">
            <div class="search-results">
                <div class="search-results__items"></div>
            </div>
        </div>
    </div>
My minimalistic styling looks like this:
/* Occupy 50% of my header row */
.search-container {
    position: relative;
    flex-grow: .5;
}

/* Search input */
#search {
    width: 95%;
    padding: 10px;
    font-size: 16px;
    border-radius: 4px;
    border: 1px solid #ddd;
    outline: none;
}

/* Container for the search results */
.search-results {
    display: none;
    position: absolute;
    top: 100%; /* Position it just below the input */
    left: 0;
    width: 100%;
    max-height: 300px; /* Set a maximum height and make it scrollable */
    overflow-y: auto;
    border: 1px solid #ddd;
    border-radius: 4px;
    background-color: #fff;
    box-shadow: 0 2px 10px rgba(0, 0, 0, 0.1); /* Add a shadow for the overlay effect */
    z-index: 1000; /* Ensure it's above other content */
}

/* Individual search result items */
.search-results__items {
    list-style-type: none;
    margin: 0;
    padding: 0;
}
Last but not least, we will need to inject the search results into the search-results. We will put the relevant Javascript code in search.js and will need to import elasticlunr.min.js, which is created by Zola.
To do so, simply put this at the end of the HTML body:
<script type="text/javascript" src="{ { get_url(path="elasticlunr.min.js") }}"></script>
<script type="text/javascript" src="{ { get_url(path="search.js") }}"></script>
(note: remove the space between {{. Zola refused to ignore the template syntax :/ )
🔗3. Create search results
Now we are ready to create our formatted search results and insert them in our search-results div container.
I’ve used the search.js example provided in the Zola docs and copied it to the static folder.
In summary, the script initializes the search when the page is loaded and does the following steps:
- load the index in
elasticlunr - add an event listener to the search input and query
elasticlunrwith the search term. - render the results into an HTML list sorted by a search ranking (sum of search results within a sliding window). Add a
<mark>around the matched results. This was the only change I made to the original script, which used<b>.
🔗End
Wasn’t that hard, right? You will most likely want to adjust the styling to your page design. The night mode needs special treatment in most cases, but for me it was a one-liner too.